Quake Tech Videos worth watching

As a fan of the Quake engine there have been a lot of new videos discussing the tech behind the engine, interesting “fixes” and other things about quake that have really been entertaining to me. While I gear up to start adding more content to this blog I wanted to highlight a few videos that I found worth my time about Quake.


Quake’s PVS: A hidden gem of rendering optimization by Matt’s Ramblings

https://youtu.be/IfCRHSIg6zo

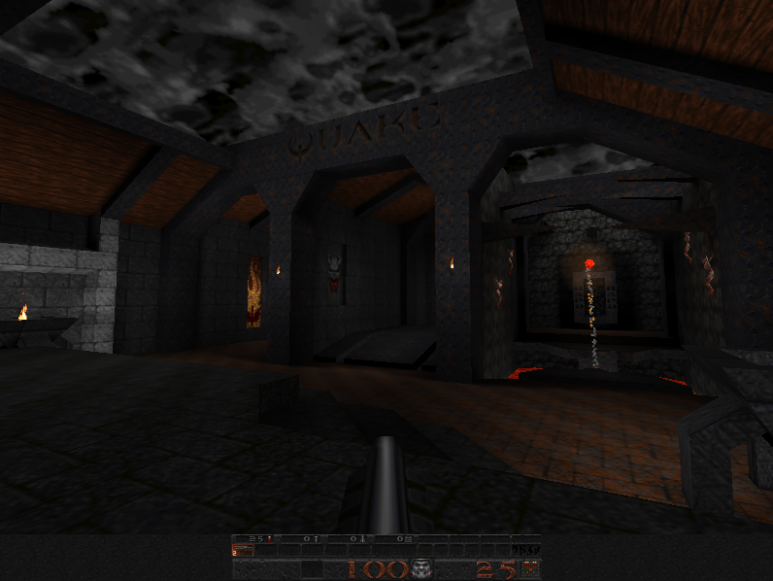
This video discusses how Quake’s potential visible set (PVS) technique optimizes rendering by pre-calculating which empty leaves in a bsp tree can see each other and storing this information in the compiled map. The program used a data structure called a portal graph and conducted an exact visibility check for each leaf using separators, which were planes that clip the target portal. Quake’s PVS was adapted for a real level with a non-linear portal graph by conducting a recursive search through all possible portal sequences, with each sequence terminating as soon as a leaf is determined to be invisible. The final visibility data for Quake’s first level consumed about 40 kilobytes of disk space and three percent of the vinyl map size, with run length encoding implemented for optimization purposes. Boasting radical hardware requirements at the time, Quake’s PVS played a major role in pre-computing visibility, lighting, collision data structures, and more.

I really enjoyed this video because the creator went above and beyond to visualize how PVS works and made me appreciate how this optimization revolutionized the technology at the time.


Fixing Quake’s ending – Quake C Coding by Big Beige Box

https://youtu.be/DEkjDkr0Qmc

Big Beige Box uses an old computer that would be around back when Quake was released in order to prove a point he made in a previous video and correct a problem he found with how Quake ends. Specifically around the character pose and musical choice. He previously claimed that he could fix these problems in 5 minutes. Can he do it using the same technology available at the time? That is the premise and why I found this video so engaging. It also gives you a very clear understanding of how character poses, animation and think all work within the vanilla Quake C code.

Excellent video!


Speedrun Science: Beating Quake with code by Matt’s Ramblings

https://youtu.be/H8sDdEKizkk

Another banger by Matt’s Ramblings which they uses global optimization algorithms and a pared-down version of TASQuake to beat the world record for completing the first level of Quake. The optimization takes over 70 hours to accomplish. Matt believes that with enough computation time, the same technique could be applied to optimize the end of every level, creating a new Quake TAS record.

This hit a sweat spot for me in regards to automation and Quake, two things very near and dear to my heart.


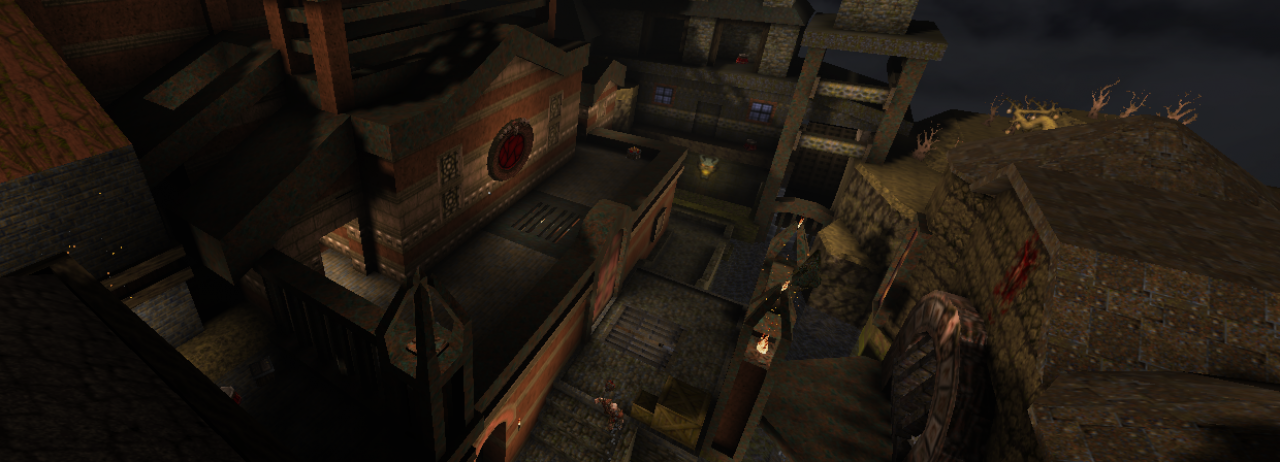
Godot 4 Quake MAP/BSP Importer Quake1 test + SDFGI + Occlusion Culling by gongphaTrashDemos

https://youtu.be/Oskd_NK6r08

Not much to say about this. I have been spending a portion of my free time learning Godot and seeing Quake being replicated in Godot isn’t something new. Qodot has been a plugin for a while, but this is the first time I have seen the levels so thoroughly visualized and rendered in a similar manner to the original engine. Very interesting.


The Story of Quake on the Game Boy Advance | MVG by Modern Vintage Gamer

https://youtu.be/R43k-p9XdIk

This video is all about how one man optimized the hell out of Quake enough to fit it on the GBA and released it to the world. A lot of this gave me flashbacks to my time learning Assembly. For the big tech heads among the Quake fans.


Hope you found some of these videos entertaining or informative. I am working on getting more content prepared for this site but progress has been staggered. I will be trying to post filler content to help bridge long gaps of content like this moving forward.

As always, cheers!

New year. New career. New Direction.

Hello followers of this site,

I’ve been considering discontinuing my subscription for this site as I haven’t had the time to update it or participate in the community lately. The main reasons for my absence are time constraints, dissatisfaction with WordPress, personal side projects, and a loss of enthusiasm for Quake.

I’ve been busy with work, life, and travel and these have often interfered with my plans for participating in Map Jams or completing code for Quake. I dislike using WordPress as a platform and it has dampened my interest in updating this site.

In my spare time, I’ve been working on personal side projects including game engines like Godot and GDevelop, AI model development, Kubernetes, and RUST. However, these projects don’t align with the content I initially intended to put on this website.

My enthusiasm for Quake faded after playing the remastered version. I realized that I was no longer enjoying the game as much as I once did, and I needed to step away for a while.

Going forward, I’m not abandoning the idea of this site but rather changing its focus. More varied content and focus on customization and building, not just exclusively for Quake. I would like to continue updating old Quake C tutorials and find new ways to engage with the modding community. I also plan to share my experiments with level design and game development.

Directions, please! (Part 2)

In part 1 we discussed all the various options I had considered for creating a “look at” trigger. This is the first of those options. A brush that triggered once a player looks a specific mangle:

/////////////////////
// On Look Direction
/////////////////////
void () lookdir_once_touch =
{
	float p_dir_r;
	float p_dir_l;
	float p_dir_f;
	float p_dir_b;
	float p_dir_u;
	float p_dir_d;
	
	makevectors(other.angles);
	vector o_forward = v_forward;
	vector o_up = v_up;
	vector o_right = v_right;
	
	// Forward and backward
	if(v_forward_x > self.speed) {
		p_dir_f = 1;
		p_dir_b = 0;
	}
	else if(v_forward_x < -self.speed) {
		p_dir_f = 0;
		p_dir_b = 1;
	} else {
		p_dir_f = 0;
		p_dir_b = 0;
	}
	
	// Left and Right
	if(v_right_x > self.speed) {
		p_dir_r = 1;
		p_dir_l = 0;
	}
	else if(v_right_x < -self.speed) {
		p_dir_r = 0;
		p_dir_l = 1;
	} else {
		p_dir_r = 0;
		p_dir_l = 0;
	}
	
	// forwards up and down
	if(v_forward_x > 0) {
		// right
		if(v_right_x > 0 && (v_up_x > self.speed/2 || v_up_y > self.speed/2)) {
			p_dir_u = 1;
			p_dir_d = 0;
		} else if (v_right_x > 0 && (v_up_x < -self.speed/2 || v_up_y < -self.speed/2)) {
			p_dir_u = 0;
			p_dir_d = 1;
		}
		// left 
		else if(v_right_x < 0 && (v_up_x > self.speed/2 || v_up_y < -self.speed/2)) {
			p_dir_u = 1;
			p_dir_d = 0;
		} else if (v_right_x < 0 && (v_up_x < -self.speed/2 || v_up_y > self.speed/2)) {
			p_dir_u = 0;
			p_dir_d = 1;
		} else {
			p_dir_u = 0;
			p_dir_d = 0;
		}
	}
	
	// backwards up and down
	if(v_forward_x < 0) {
		// right
		if(v_right_x > 0 && (v_up_x < -self.speed/2 || v_up_y > self.speed/2)) {
			p_dir_u = 1;
			p_dir_d = 0;
		} else if (v_right_x > 0 && (v_up_x > self.speed/2 || v_up_y < -self.speed/2)) {
			p_dir_u = 0;
			p_dir_d = 1;
		} 
		// left
		else if(v_right_x < 0 && (v_up_x < -self.speed/2 || v_up_y < -self.speed/2)) {
			p_dir_u = 1;
			p_dir_d = 0;
		} else if (v_right_x < 0 && (v_up_x > self.speed/2 || v_up_y > self.speed/2)) {
			p_dir_u = 0;
			p_dir_d = 1;
		} else {
			p_dir_u = 0;
			p_dir_d = 0;
		}
	}

	makevectors(self.mangle);
	
	/*
	// horizontal difference
	bprint(ftos(other.v_angle_y - self.mangle_x));
	if(other.v_angle_y - self.mangle_x <= self.t_width){
		bprint("direction approximately matched");
	}
	bprint("\n");
	
	// horizontal difference - FABS ind
	bprint(ftos(fabs(other.v_angle_y) - fabs(self.mangle_x)));
	if((fabs(other.v_angle_y) - fabs(self.mangle_x)) <= self.t_width){
		bprint("direction approximately matched");
	}
	bprint("\n");
	*/
	
	// horizontal difference - FABS wrap
	/*
	bprint(ftos(fabs(other.v_angle_y - self.mangle_x)));
	if((fabs(other.v_angle_y - self.mangle_x)) <= self.t_width){
		bprint("direction approximately matched");
	}
	bprint("\n");
	*/
	
	/*
	// horizontal difference - modangle
	bprint(ftos(anglemod(other.v_angle_y) - anglemod(self.mangle_x)));
	if((anglemod(other.v_angle_y) - anglemod(self.mangle_x)) <= self.t_width){
		bprint("direction approximately matched");
	}
	bprint("\n");	
	*/ 
	
	entity p = other;
        
        // Find out which direction player facing
        makevectors (p.v_angle);

        // Check if there is any things infront of the player
        traceline (p.origin , (p.origin+(v_forward * 500)) , FALSE , p);
};

void () trigger_lookdir_once =
{
	InitTrigger ();
	self.touch = lookdir_once_touch;
};

I left in the horizontal difference tests I created for reference. Lets talk about the gist of this code. The trigger_lookdir_once function is very similar to most triggers in the codebase so let’s skip straight to lookdir_once_touch as it has a lot of meat to unpack.

	float p_dir_r;
	float p_dir_l;
	float p_dir_f;
	float p_dir_b;
	float p_dir_u;
	float p_dir_d;
	
	makevectors(other.angles);
	vector o_forward = v_forward;
	vector o_up = v_up;
	vector o_right = v_right;

The variables being useds are the p_dir_r for direction right, direction left, direction forward, direction backward, direction up, and direction down for the player.
p = player
dir = direction
I then look at the other, which I believe is the mangle of the entity and run the makevectors function which creates v_forward, v_up, v_right. These I set immediately to o_forward, o_up, and o_right as the v_ vector variable is global in scope and I don’t want them to change. (I was being overly cautious so I ended up just going with the provided v_vector variables in the end) I use the

	// Forward and backward
	if(v_forward_x > self.speed) {
		p_dir_f = 1;
		p_dir_b = 0;
	}
	else if(v_forward_x < -self.speed) {
		p_dir_f = 0;
		p_dir_b = 1;
	} else {
		p_dir_f = 0;
		p_dir_b = 0;
	}

I then check to see if the player is moving forward, backward, left, right, up or down by checking the speed in that direction. If any of these things is true I then set them to 1, if not, then 0. This is not optimized in any way but simplified the debugging and testing of the function a great deal. Rinse and repeat for left and right.

	
	// forwards up and down
	if(v_forward_x > 0) {
		// right
		if(v_right_x > 0 && (v_up_x > self.speed/2 || v_up_y > self.speed/2)) {
			p_dir_u = 1;
			p_dir_d = 0;
		} else if (v_right_x > 0 && (v_up_x < -self.speed/2 || v_up_y < -self.speed/2)) {
			p_dir_u = 0;
			p_dir_d = 1;
		}
		// left 
		else if(v_right_x < 0 && (v_up_x > self.speed/2 || v_up_y < -self.speed/2)) {
			p_dir_u = 1;
			p_dir_d = 0;
		} else if (v_right_x < 0 && (v_up_x < -self.speed/2 || v_up_y > self.speed/2)) {
			p_dir_u = 0;
			p_dir_d = 1;
		} else {
			p_dir_u = 0;
			p_dir_d = 0;
		}
	}
	
	// backwards up and down
	if(v_forward_x < 0) {
		// right
		if(v_right_x > 0 && (v_up_x < -self.speed/2 || v_up_y > self.speed/2)) {
			p_dir_u = 1;
			p_dir_d = 0;
		} else if (v_right_x > 0 && (v_up_x > self.speed/2 || v_up_y < -self.speed/2)) {
			p_dir_u = 0;
			p_dir_d = 1;
		} 
		// left
		else if(v_right_x < 0 && (v_up_x < -self.speed/2 || v_up_y < -self.speed/2)) {
			p_dir_u = 1;
			p_dir_d = 0;
		} else if (v_right_x < 0 && (v_up_x > self.speed/2 || v_up_y > self.speed/2)) {
			p_dir_u = 0;
			p_dir_d = 1;
		} else {
			p_dir_u = 0;
			p_dir_d = 0;
		}
	}

Up and down were a totally different beast. You needed to find the up and down according to the forward and backward velocity and this still doesn’t account for absolute up or down. I can’t recall the exact rationality behind these checks but testing this trigger I found that you need to both test the mangle set by the entity and the speed of the player themselves interacting with the brush. I found that a very fast player can bypass the brush or even strife throught the brush without triggering it…

With this code you can determine the player’s directions and trigger events based on them.

So this works and I spent a good amount of time learning about how player movement works… BUT….

	entity p = other;
        
        // Find out which direction player facing
        makevectors (p.v_angle);

        // Check if there is any things infront of the player
        traceline (p.origin , (p.origin+(v_forward * 500)) , FALSE , p);

I get the player entity then I have a line that you would think might have been the totality of the code required for this function, but JUST DOESN’T result in meaningful data for what I need to do here, which is compare a player’s direction with that of a brush’s mangle.

Lastly I check to see if anything is infront of the player… OH SNAP! I have basically solved my 3rd option for solving this problem. This is the result:

Almost immediately after figuring this out… I created a relocate set of entities…

I then fell into the rabbit hole of creating a set of entities that allow you to turn your quake levels into indie horror games. Maybe more about that later.

The end of an era. Post-mortems on the ShoTro maps

I have been struggling with map jams since the day I started. I love mapping in Quake but found that I had too much ambition and not a lot of time.

But why map at all?

It has to do with some of the feedback my maps have gotten. When someone picks up on those little details and “gets” the intentions it is fantastic. I live for that one or two reviews that truly get the map I created. I create maps that fall outside the norm on purpose. I feel like most of the community sees a map of mine and just tries to rush to the end of it. My first map was an experiment to mess with people and very simplistic. I don’t know if anyone remembers it. My second map… OH, my second map, was an EPIC that flew over the head of most who played it.

I won’t describe it but instead provide Preach’s review of the map and see if you can pick up on what made me so incredibly happy about his review:

ShoTro’s Map: An enormously creative level, taking full advantage of the idea of multiple revisits to the same space. I liked the sense of progression, on the first time through, fighting the Nail Ogre and the Death Guard on the way to The Gallows is a test which can cost you dear in HP. By the 3rd time it’s a breeze that you swing through any time you want to stock up on free rockets and nails! 

0 runes: This took by far the most attempts, and might have soured me on the whole map if I hadn’t revisited so much afterward. I don’t know if it’s just because skill 3 Chthon leads shots better, but his arena killed me. After about 20 attempts I came up with the strat in the final demo to skip half a round of fighting, but this still took another 15 tries to record. And of course, I get glitched into the lava immediately after surviving… 

Entrance to the first “boss” to get the first rune before restarting the level

1 rune: the library was my favorite bit of all the runes, and I found it neat that later on, you had the idea to remove the books from the shelves, to explain why that part stopped working! 

You will see this room a few times upon restarting the level

2 runes: another cool change to the map to create shortcuts and new paths. I died to the edie rush first time, barely survived second go. 

3 runes: took me ages to discover the new gold key location, the whole new tower on the map was really cool. I mistook an outcrop of rock below the tower for a secret and willingly jumped to my death. Shub lair was a really cool texture theme and design, took me a while both to crack the gimmick and then find all the sigils. Definitely some hair-raising combat moments, but the respawning items kept it fair. 

I wanted a grand scope for the level.

4 runes: the combat in the underground was tougher than Vermis, I guess having the run of the map made it easier to pick a fight with the latter. The demo is a second try as I died to an Edie first time. The specimin tanks were really cool down there! 

One of many Dark Souls references found in the map.

I loved this review! There were a couple of reviews like this, but Preach was the first one to notice that the books vanished after the library “boss” was defeated. In fact, there are details like that after every “boss” in the map but Preach might be the first person who pointed it out. But for every review like Preach’s there were 4-5 reviews like this:

Sorry didn’t get on with this, so no real comment

I eventually released a definitive edition of the map that can be found on Preach’s site found here.

100 Brush Jam v4 – Cerebral Enema

100 Brushes. A constantly shifting battle

Cerebral Enema was my released next map. It was met with the same level of love/hate as my first. The concept was that of an arena map using only 100 brushes but a ton of entities to control the flow of the combat. With the exception of a scrag that always wants to fly backward behind buildings everything worked. It took me only two days to build which might be the least amount of time I have spent on a map but the concept was drawn on paper and reiterated on for weeks.

My favorite review was by Tribal:

This one took me a while to finish… my ass was kicked so many times in my first run that i rage-quit the game. Days later, i tried again and rage-quit again… On my third try i played in “normal” mode and i was able to finish the map, then i noticed that the difference between “normal” and “hard” is just one enemy (normal=65 hard=66) so i tried again in hard mode and i won this time \o/ 

At first i hated this map, now i love it because it makes me feel like a real champion XD 

This was exactly what I was going for!

The Concept

I wanted to have dynamic combat so that the map, upon replaying offered something new each time. There are two points in the map where the player ends up in the center and waves of enemies start spawning. From there two conditions can be met to start additional spawns.

  • To catch those cheesing the initial spawning of enemies there is a timed release of additional enemies who will flush the players out from hiding.
  • To keep combat moving when a certain number of monsters are killed a new wave of enemies spawn that requires heavier firepower.

Players who simply used what weapons were given to them right away to kill the weaker enemies were unprepared for the stronger enemies. Those who tried cheesing the combat were met with overwhelming amounts of enemies once flushed from their spots. Those who stood and fought and used their weapons effectively were rewarded as the map will drop extra ammo for them if they complete the arena challenges in a specified amount of time. Meaning… players who played the map with skill and paid attention got the most out of the map. It was also shocking how many players attacked the sleeping Vermis and repeatedly did so screwing themselves over.

I think I got the most enjoyment out of the playbacks of this map out of all of my maps. The random shifting of all the walls at the end made the playbacks very entertaining but I didn’t test in hard mode enough and some players ran out of ammo.

Again… no one has figured out the secret to winning on hard without running out of ammo. It requires you to be observant and take stock in the situation to make the right choice; in Quake a game about shooting things until they die, I am asking that the player stop and think then improve on the following play through.

One more… Somewhere…

I have one map that came before these. If I find it I will add it later, but for now that is all. I would love to do a playthrough of my older maps on twitch sometime to see how I feel about them again, but for now it is time to keep working on my current projects. My newest map created as Null Point Paladin was more straight forward, but rewarded exploration heavily. I have other maps in the works as part of the “Slow Jam” which may take about a year to get to the testing phase of things. I will update as that progresses.

Quake Noir color palette change

Changing the Quake Color Palette

If you would like to give your map pack, mod or just change the quake experience visually you can update the 256 color palette. There are a few ways to do this, but I would like to talk about one very simple solution that I was unaware of until yesterday, QueenJazz’s QPal Master python script found here: https://github.com/jmickle66666666/qpal

After downloading the script I had to update my python installation which brought me to an issue running the script.

I didn’t have PIL installed on my system by default. So how do you get it installed? And PIL is an older library so how do you get a more up-to-date version that you can use for other projects? After a little research I found Pillow, an up-to-date version fork of PIL. So I wanted to install that module into Python first… but I couldn’t run PIP. So lets get started down this path…

First download the get-pip.py file from the stable release: https://pip.pypa.io/en/stable/installing/

Technically you can also just put the pip file into the python directory and run it from there using: “python get-pip.py”

The way I ran it in python was a little different. By default you can use IDLE by right clicking on the file. It should show the Python file icon if Python is installed on your system.

Once the file is loaded just run it in the menu or press F5

PIP will take some time to install. Once you have that installed open a CMD and navigate to the Python install directory (I opened the directory from the start menu icons then followed those links to the install directory). Once there run install Pillow.

python -m pip install Pillow

After installing Pillow you should now be able to run QPal-Master. Simply run the file in IDLE but unlike pip, use the “Run… Customized” option.

This will let you specify which file to read in… and this brings me to how this code actually works. There are two modes:
1. Create lmp file from png
2. Create png from lmp
If you specify a png file as the argument it will create a “palette.lmp” file that can then be added to the “gfx” directory in your mod or Quake id1 directory. (Override the existing. Back up the original, of course.) If you want to copy an existing lmp file and create a png file pass the lmp file in as the argument to run the script. It is pretty easy… but how do you modify the colors?
Open the palette.png file. It will look like this:

This should look familiar

Each color is a pixel in the image and each represents the 256 color palette in quake. Backup this file first, then edit the colors. Just keep in mind changing the colors effects everything in the game: UI, enemies, weapons, and textures. So this isn’t recommended if all you are looking for is to change a few textures… update the textures. But if you want to modify the entire visual color experience of Quake this might be right up your alley.

I had fun with this tool and hope to do something with it in the future or hope to see others do some cool things with it in the future.

Wha happun?

OK, not a great title but I feel like those who get the reference will appreciate it. I am not dead, but the PC I used to work on Quake projects died… I lost my primary hard-drive switched to the backup and then the computer died a second time within days of getting it back from being repaired. The culprit? I really don’t know. About the same time I got a promotion at work and put into a situation where I had to prove that I was qualified for that promotion. High stakes.

I did what I needed to and everything is fine but this blog and my involvement with the Quake community was put on the back burner while I worked 55-68 hour work weeks, taking care of the family, traveling often, and the coming holidays approached.

Meanwhile… I have received a lot of positive feedback from players who have played Moonlit Keep (my 2018 X-mas Jam map) which needed a patch to complete. Despite the need for a patch the reviews have been pretty positive and I feel a bit more enthused about trying my hand at mapping again this year.

While I doubt I will be doing anything huge with Quake C or Quake in general, I will continue my tutorial series where I update existing tutorials and explain interesting things I discover about QC sometime in the next month or two. I am also getting into Godot development for business purposes, but I can see myself using it to create a few small games this year.

Stay tuned…

Steve’s amazing texturing tutorial.

On discord a week ago a user who goes by the name of Steve (an obvious reference to the amazing web series The Professor Brothers and the show called China Il. on Adult Swim btw) posted a great tutorial on texturing that only really exists on the Quake Mapping discord at the moment.

With Steve’s permission I wanted to host the tutorial online so that others can get access to it as well. Without further ado:

Relocate: The relative positioning trigger brush

OK, I haven’t been keeping up with this blog nearly as much as I wanted to. Work and family has been the primary factor. But after weeks of being unavailable I have finally completed the trigger_relocate brush entity. Let me explain the concept VS the reality of where it ended up.

Concept

The concept was simple: teleport a player silently without modifying their perspective. Meaning that no matter the angle, direction or location within a room, they would be placed in a relative position in another room. This is best showcased in the thousands of cheap horror games being churned out on steam almost daily. Surely this can be done in Quake… right?

The reality

So I tried a test run. Simply teleporting the player based on a distance. I built two almost identical locations on equal z-axis coordinates and measuring the distance I simply used:

vector loc = [calc_x + self.hieght, calc_y, calc_z];

// teleport relative to the two points
setorigin(other, loc);

The trigger would simply move the player to the difference in the x coordinates according to what is set in the map editor. It worked… albeit it would maybe put the player in the wall if triggered too early or late. So, how do I rectify this? Well, make the entity a brush and only move the entities within that brush to the new location. This solves a few problems:

  • The mapper controls when, where the player can relocate from/to
    • This means if there is an obstruction in the second room the mapper can set the trigger brush to only act on touch in areas where the player wouldn’t get stuck in walls
    • This also means multiple entities can be all moved in bulk from one location to another
  • This works if you set a distance but doesn’t work at all if you need to set a point in space for the relocation to work

This means that the relocate functionality requires me to position all entities based on the origin of the brush, which would require the mapper understanding the exact location of the origin of the brush and place another point on the map exactly… or we use two point entities.

info_relocate_origin_ref and info-relocate_destination_ref are born!

Initially I tested with info_null entities and the concept worked without a hitch once I figured out the math:

	// take entity that triggers (other) and calculate its position relative to the origin target
	calc_x = (other.origin_x - ot.origin_x);
	calc_y = (other.origin_y - ot.origin_y);
	calc_z = (other.origin_z - ot.origin_z);
	// take that relative positioning and move the other towards the destination
	vector loc = [calc_x + dt.origin_x, calc_y + dt.origin_y, calc_z + dt.origin_z];

	// teleport relative to the two points
	setorigin(other, loc);

I am not going to explain it in detail, but this was the optimal solution based on my experiments. You need to find the difference between the trigger(er)’s location (x, y, and z coordinates) and the location of an set point on the map. Then find the second point on the map and create a vector that plots the new location for the entity, then set that as the entity’s (the entity that triggered the relocation) to the new location. To facilitate an easier understanding of how to accomplish this task, two new entities were created and I built in validation within trigger_relocate to ensure these entities are assigned to the trigger correctly. (error messages will fire on map load if they are not)

My next issue was the overly complicated setup.

You had to trigger… a trigger?

This part I had a bit of trouble with. My trigger_relocate either required a trigger to function or wouldn’t stop triggering by itself. In order to be a useful feature a mapper would need to control how it worked. Luckily progs_dump had examples of START OFF as a spawnflag for other entities. Despite my being dense after not coding in QC for weeks I got it working. Now you can toggle it on and off, choosing to turn it off first then controlling its availability from there.

That way, the trigger_relocate entity can stand alone without needing an external trigger to fire but also work once triggered by another entity.

That is about it… for now. Next steps?

  • Add player only spawnflag
  • Add allow projectiles spawnflag
  • Utilize the push_once spawnflag to make the trigger only fire once
The end result

I have been working with a mapper to test this out and the results of those tests will be made public soon enough. If anyone sees any flaw in this code please contact me ASAP. While I am sure there is likely a hole or flaw in my design, it hasn’t arisen yet.

The full source code will be published with a future version of progs_dump (fingers crossed) once it has been vetted thoroughly. As for trigger_onlookat my second contribution… that will go into another article as a summary of “Directions Please” since a lot of that research yielded a single solution that I will outline as the time comes.

Directions, please! (Part 1)

Hello everyone… whoever might be visiting this site. I have been messing with a few things in QuakeC particularly the ability to seamlessly transfer the player to new locations without special effects. This has been done in a few doom maps and is very prevalent in horror games.

Examples:

  • A player looks up to see something on the ceiling but when they look back down the room around them is totally different.
  • Looking out of a window a continuous swarm of troops pass by (in reality it is only 3-4 enemies looping continuously)
  • When the player walks down the hall in one direction the hall is endless but when he walks back he can return the way that he came

I showed the following gif on the Quake Mapping discord:

This technique will be shared in a future article

It was met with a lot of excitement but a question was raised, “How can we make sure the player is looking the right direction?” and that is how a new series of experiments involving directions were created.

What is the problem?

As always I am going to state the problem I am trying to solve first then what logic I employed to find a solution, the difficulties I faced and then the final solution I came up with.

So what was I trying to solve? This time. Multiple things. I wanted to understand if I can determine with a player is looking in a direction before triggering another entity. There are multiple ways to do this:

  1. Create a brush with a mangle and determine if the player is looking towards the mangle while touching the brush.
  2. Create a brush with flags that have directions (up, down, left, right, forward, back) and see if that player is looking in the selected directions.
  3. Create a brush that has a target. Determine if the player is looking at the target.

Each one of these has a potential problem. Let’s look at the pros and cons to each.

1. The brush with a mangle to look at

Pros:

  • Super easy to set up for mappers
  • Mappers can define their own tolerance
  • One line of code for horizontal detection

Cons

  • Looking up or down is difficult to get right due to the fact the pitch values change according to if the player is facing “left” or “right”
  • Might be confusing if the mapper doesn’t direct the players to look in the expected direction

2. The brush with flags

Pros:

  • This logic is fairly straightforward and provided by the makevectors function
  • If configured correctly in a .fgd then this would be even easier for mappers to use
  • Mappers can set the tolerance

Cons:

  • Easier to set, harder to understand. Left, right, forward, and backward are relative terms and might be confusing without experience with the trigger
  • Not as accurate. This trigger provides 24 (8*3) possible directions though
  • Might have the same issue as #1. The mapper needs to direct a player to look in a direction regardless of where they are standing in the brush

3. The brush with a target

Pros:

  • The mapper can make anything a target
  • Might make more sense for the player to look at a symbol or object of importance to trigger an event
  • The mapper can set distance and tolerance values

Cons:

  • More steps to implement correctly
  • More required settings for mappers
  • Not compatible with vanilla QuakeC sources since it requires target2 (one to trigger and one for the direction detection)

To be continued…

This article is long enough. We have taken a look at the ideas behind the solutions I would like to investigate. In Part 2 I will go into what I did to solve the first of these trigger types and the issues I ran into while testing it.

Wall Spikes – Fixed

I tried a few minor tweaking tutorials for rapid-fire shotguns, flashlight, and just a coding standards tutorial for QuakeC that were fairly bland. From there I wanted to do something I fondly remember from the first time I tried coding for Quake… nails that stick to walls. Granted, the first time I did this I made the nails explode after a short period and that might have side-stepped the errors that I ran into but this time I just wanted to replicate what I thought the tutorial wanted to do… make nails stick to walls.

The Tutorial

I looked up the tutorial on Inside3D here: http://www.insideqc.com/qctut/qctut-1.shtml

void() spike_touch =
{
        local float rand;
        if (other == self.owner)
                return;
        if (other.solid == SOLID_TRIGGER)
                return; // trigger field, do nothing
        if (pointcontents(self.origin) == CONTENT_SKY) {
                remove(self);
                return;
        }
        // hit something that bleeds
        if (other.takedamage) {
                spawn_touchblood (9);
                T_Damage (other, self, self.owner, 9)
                remove(self);   //so they don't float...
                return;         //to avoid errors
        } else {
                WriteByte (MSG_BROADCAST, SVC_TEMPENTITY);
                
                if (self.classname == "wizspike")
                        WriteByte (MSG_BROADCAST, TE_WIZSPIKE);
                else if (self.classname == "knightspike")
                        WriteByte (MSG_BROADCAST, TE_KNIGHTSPIKE);
                else
                        WriteByte (MSG_BROADCAST, TE_SPIKE);
                WriteCoord (MSG_BROADCAST, self.origin_x);
                WriteCoord (MSG_BROADCAST, self.origin_y);
                WriteCoord (MSG_BROADCAST, self.origin_z);
        }
        self.velocity = '0 0 0';        //makes the nail stop
        self.nextthink = time + 10;     //to prevent packet overflows
        self.think = SUB_Remove;        //same reason as above

};

The Problem(s)

I immediately ran into problems. The issue revolves around this logic:

        // hit something that bleeds
        if (other.takedamage) {
when an enemy dies they enter a solid dying state

Every time I fired more arrows than required to kill an enemy or shot a brush with health nails would float in the air.

BUT WAIT! The tutorial removed the spikes on entities that took damage! Enemies, doors, and buttons all can take damage so shouldn’t the spikes be removed?, I can hear you say.

The issue here is that once these entities hit zero health their state changes from an entity that can be damaged to one that is dying. Enemies briefly go into a dying state and doors will become solid and begin moving into an open position.

The Solution

My knowledge of QuakeC ended over 16 years ago. So fixing this tutorial simply required me to figure out one thing: how in the world do I remove spikes from things that had or have health?
To fix this we need to only stop and float spikes that hit solids that don’t have health values defined. I modified the code about a dozen times before I realized that, in QuakeC, I can check if a value was set by logically checking the value. In layman’s terms, QuakeC evaluates everything above zero as true. With that knowledge, we need to replace this:

        self.velocity = '0 0 0';        //makes the nail stop
        self.nextthink = time + 10;     //to prevent packet overflows
        self.think = SUB_Remove;        //same reason as above

Which will fire for all things that don’t take damage. Instead, we will check for if the thing the spike hits has health. If it does, we simply remove the spike but if it doesn’t then we halt the spike and set a time to remove the spike in the future.

if(!other.health) {
	self.velocity = '0 0 0';    //make the nail stop
	self.nextthink = time + 5;  //to prevent packet overflows
	self.think = SUB_Remove;
} else {
	remove(self);  // removed to prevent nails from vanishing
}

Again, this was done on day 1 of my return to QuakeC. I am more than willing to fess up to this fix having problems.

Next up I will be taking a look at a low effort stealth mod tutorial and adding sneak attacks in order to flesh out the tutorial.